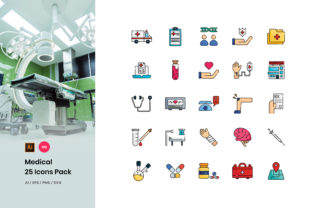
A Practical Review of the Medical Icons Pack for Embroidery
As someone who’s stitched countless designs for clients and my own shop, I look at every embroidery file with a practical eye. The question isn’t just “is it pretty?” but “how will it perform on fabric, and who will actually want the finished product?” Today, I’m thinking through the Medical Icons Pack, a graphics set clearly intended for medical, hospital, and clinic themes, as a real asset for my embroidery work.
The Clean, Communicative First Impression
Opening this pack, the mood is immediately professional and clear. These aren’t whimsical illustrations; they’re communicative symbols. The shapes feel deliberate, meant to be recognized instantly—think a heartbeat line, a pill capsule, a syringe. This visual personality is about trust and function. For embroidery, this translates to projects where clarity and recognition are paramount. It naturally belongs on items for medical professionals, gifts for nurses, or wellness-themed boutique products. The inclusion of multiple styles, like a line outline version, suggests versatility, which is a designer’s first clue that we can adapt the look to different fabric contexts.
Where This Design Thrives in Real Stitching Projects
Let’s paint a real scenario. I’m preparing a custom embroidered tote bag for a group of midwives. They want something professional yet personal for a conference. The Medical Icons Pack offers exactly the symbolic language I need. A clean line outline icon, stitched with a precise satin stitch on the bag’s front panel, conveys their profession without being overly decorative. The stitch clarity here is key; a well-defined icon reads as quality.
This pack’s strength shines across many embroidery projects. On the left chest of a custom apparel sweatshirt for a clinic team, a single icon becomes a subtle badge of affiliation. For a personalized gift like a tea towel or pillow cover for a retiring doctor, a cluster of icons can create a thoughtful, commemorative design. In a craft business, these icons can anchor entire product lines: embroidered patches for student nurses, baby embroidery on a onesie for a newborn in a medical family, or even holiday embroidery on an apron for a medical-themed bake sale. The icons lend brand consistency if you’re creating merchandise for a small health-focused shop. They also boost customer trust on an Etsy listing—the design feels authoritative, which reassures buyers looking for a serious gift.
Visual Appeal and Stitched Value
On fabric, the success of such icons hinges on simplicity. A clean outline means less stitch density, which is a gift on thicker fabrics like sweatshirts or tote bag canvas where dense fills can pucker. The visual appeal is about crispness. A well-embroidered medical icon on a dark fabric background, using bright white or light blue thread, has high impact. It looks professional, which inherently increases the perceived value of the handmade product. For commercial embroidery projects, like clinic uniforms or corporate gifts, this professional tone is essential.
Caution Areas: Where to Plan Carefully
Not every project is an ideal canvas. The detail level in some icons—tiny corners, fine lines—requires forethought. On small hoop sizes, like for a cap or a baby sock, extremely small versions might lose definition; the stitching could blur. Textured fabrics like linen or looped towels can break up fine lines. On stretchy fabric like t-shirt jersey, a running stitch outline might distort more than a solid fill.
I’d be careful with dark fabric if the design file doesn’t include a sufficient underlay or if the outlines are too slender; they might get lost. Embroidering on curved surfaces like caps demands testing, as perspective distortion can make symmetrical icons look off. And for products destined for frequent washing—think kitchen towels or scrub caps—you need a robust stitch configuration that won’t fray. The pack’s line outline style might be more vulnerable here than a solid fill version.
The Embroidery Designer’s Practical Checklist
Before I commit this to a client’s project or my shop inventory, here’s my mental run-through. First, always test the design on scrap fabric first. Use the same material you intend for the final product. This reveals everything. Check thread color contrast against your background fabric—medical icons often rely on high contrast for clarity. Review stitch density in your software; if it’s too high for a delicate fabric, adjust. Confirm hoop size compatibility; does the design scale nicely to your intended size without losing key details?
Inspect small details like the points of a syringe or the curves of a heart; these are the spots where stitch angles matter. I’d test it in black and white mockups to see how it reads without color, often a good test of form. Compare light and dark fabric backgrounds digitally if possible. For physical stitching, use proper stabilizer; for clean icons, a firm stabilizer is often your best friend to prevent puckering.
Finally, a crucial note for all digital embroidery file users: check whether the design works for both personal and commercial projects. The product description doesn’t specify license terms. Confirm licensing before selling finished items or digital products. This is a non-negotiable step for any craft business or Etsy seller. Also, since exact file formats, stitch counts, and machine compatibility aren’t listed, I’d advise verifying those with the seller before purchase to ensure they match your equipment and workflow.
The Final Stitch: A Pack with Clear Purpose
The Medical Icons Pack isn’t a generic decorative set. It’s a specialized tool. Its value in embroidery comes from its focused theme and likely clean construction. For makers targeting the medical community, creating wellness-themed products, or needing authoritative symbols for small shop merchandise, it fills a clear niche. Its giftability and professionalism are high. But its success on the needle depends entirely on mindful application—choosing the right project, fabric, and stitching approach to let those clean icons shine as intended. In the right context, stitched onto the right item, it will communicate precisely what you, and your customer, want it to say.